Electromechanical 7-Segment Display Is High Contrast Brilliance

The seven-segment display is most well known in LED form, but the concept isn’t tied to that format. You can build a seven-segment display out of moving parts, too. [tin-foil-hat] has achieved just that with a remarkably elegant design.

As you might expect, the build relies heavily on 3D-printed components—produced in white and black plastic to create a high-contrast display. It’s a simple choice that makes the display easy to read in a wide variety of lighting conditions, and far less fussy than toying with LEDs and diffusers and all that.

Actuation of each display segment is achieved electromagnetically. Effectively, each segment behaves like a flip dot, with the orientation controlled by energizing one of two electromagnets per segment. Controlling the electromagnets is an ESP32, which is hooked up to the various segments via a Darlington transistor array, with multiplexing used to minimize the number of IO pins required. A shift register was also employed to let the microcontroller easily drive four of these electromechanical digits.

It’s a simple build, well explained—and the final result is aesthetically pleasing. We’ve seen a few builds along these lines before, albeit using altogether different techniques. Lots of different techniques, in fact! Video after the break.

Continue reading “Electromechanical 7-Segment Display Is High Contrast Brilliance”
Fraens’ New Loom And The Limits Of 3D Printing

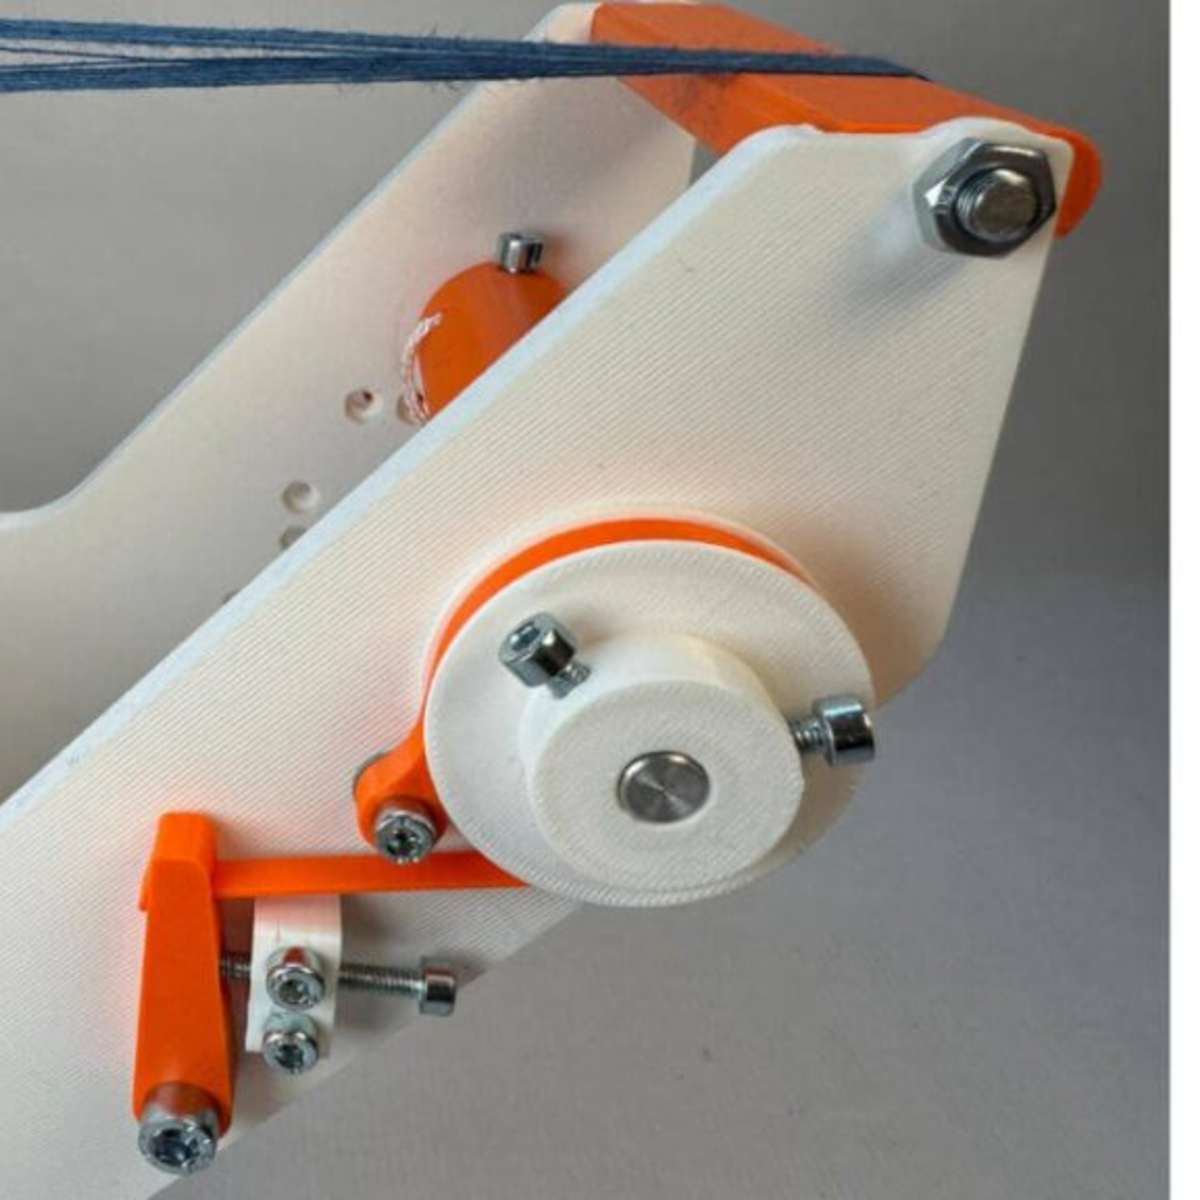
[Fraens] has been re-making industrial machines in fantastic 3D-printable versions for a few years now, and we’ve loved watching his creations get progressively more intricate. But with this nearly completely 3D-printable needle loom, he’s pushing right up against the edge of the possible.

The needle loom is a lot like the flying shuttle loom that started the Industrial Revolution, except for making belts or ribbons. It’s certainly among the most complex 3D-printed machines that we’ve ever seen, and [Fraens] himself says that it is pushing the limits of what’s doable in plastic — for more consistent webbing, he’d make some parts out of metal. But that’s quibbling; this thing is amazing.

There are mechanical details galore here. For instance, check out the cam-chain that raises, holds, and lowers arms to make the pattern. Equally important are the adjustable friction brakes on the rollers that hold the warp, that create a controlled constant tension on the strings.  (Don’t ask us, we had to Wikipedia it!) We can see that design coming in handy in some of our own projects.

On the aesthetic front, the simple but consistent choice of three colors for gears, arms, and frame make the build look super tidy. And the accents of two-color printing on the end caps is just the cherry on the top.

This is no small project, with eight-beds-worth of printed parts, plus all the screws, bearings, washers, etc. The models are for pay, but if you’re going to actually make this, that’s just a tiny fraction of the investment, and we think it’s going to a good home.

We are still thinking of making [Fraens]’s vibratory rock tumbler design, but check out all of his work if you’re interested in nice 3D-printed mechanical designs.

Continue reading “Fraens’ New Loom And The Limits Of 3D Printing”

It’s A Bench, But It’s Not Benchy

Whatever the nuances are surrounding the reported taking down of remixes derived from the famous Benchy 3D printer stress test, it was inevitable that in its aftermath there would be competing stress tests appear under more permissive licensing. And so it has come to pass, in the form of [Depep1]’s Boaty, a model that’s not a boat, but a bench. Sadly this is being written away from a 3D printer so we can’t try it, but we can immediately see that its low bed contact area from having spindly legs would be a significant test for many printers’ bed adhesion, and it has overhangs and bridges aplenty.

It’s always interesting to see new takes on a printer stress test, after all we can all use something to check the health of our machines. But the Benchy saga isn’t something we think should drive you away from the little boat we know and love, as it remains an open-source model as it always has been. We don’t know the exact reasons why the derivatives were removed, but we understand from Internet scuttlebut that the waters may be a little more cloudy than at first supposed. If there’s any moral at all to the story, it lies in reading and understanding open source licences, rather than just assuming they all allow us to do anything we want.

Meanwhile it’s likely this model will be joined by others, and we welcome that. After all, innovation should be part of what open source does.

Missed the Benchy takedown story? Catch up here.

Thanks [Jeremy G] for the tip.

Comparing Ways To Add Threads To Your 3D Prints

Adding threads to your 3D prints is a life-changing feature, but obviously there are a lot of trade-offs and considerations when deciding on how to go about this exactly. Between self-tapping screws, printed threads, heat inserts and a dozen other options it can be tough to decide what to go with. In a recent video [Thomas Sanladerer] runs through a few of these options, including some less common ones, and what he personally thinks of them.

Confounding factors are also whether you’re printing on an FDM or resin printer, what size thread you’re targeting and how often the screw or bolt will be removed. The metal heat inserts are generally a good option for durability, but when you have big bolts you get a few other metal-based options too, including thread repair inserts and prong nuts. Tapping threads into a print can also be an option, but takes a fair bit of patience.

Slotted nuts can be an idea if you don’t mind carving a space into your model, and the comments dove on embedding nuts in the print by pausing during printing. Ultimately [Thomas] really likes to use a type of self-forming threads with just three protruding sections into the hole that the bolt taps into, which reduces the stress on the part and works well enough for parts that only have to be screwed down once or twice.

Continue reading “Comparing Ways To Add Threads To Your 3D Prints”

Life Without Limits: A Blind Maker’s Take On 3D Printing

In the world of creation, few stories inspire as much as [Mrblindguardian], a 33-year-old who has been blind since the age of two, but refuses to let that hold him back. Using OpenSCAD and a 3D printer, [Mrblindguardian] designs and prints models independently, relying on speech software and touch to bring his ideas to life. His story, published on his website Accessible3D.io, is a call to action for makers to embrace accessibility in their designs and tools.

[Mrblindguardian]’s approach to 3D printing with OpenSCAD is fascinating. Without visual cues, he can still code every detail of his designs, like a tactile emergency plan for his workplace. The challenges are there: navigating software as a blind user, mastering 3D printers, and building from scratch. His tip: start small. Taking on a very simple project allows you to get accustomed to the software while avoiding pressure and frustation.

His successes highlight how persistence, community support, and creativity can break barriers. His journey mirrors efforts by others, like 3D printed braille maps or accessible prosthetics, each turning daily limitations into ingenious innovations. [Mrblindguardian] seems to be out to empower others, so bookmark his page for that what’s yet to come.

Accessible tech isn’t just about empowering. Share your thoughts in the comments if you have similar experiences – or good solutions to limitations like these! As [Mrblindguardian] says on his blog: “take the leap. Let’s turn the impossible into the tangible—one layer at a time”.

Continue reading “Life Without Limits: A Blind Maker’s Take On 3D Printing”

Sheet Metal Forming With 3D Printed Dies

Sheet metal is very easy to form, including the pressing in of intricate shapes with dies and a hydraulic press, but the dies themselves are slightly harder to come by. What if we could 3D print custom dies to stamp logos and more into sheet metal? This is the premise of a recent video by the Stick Shift Garage channel on YouTube in which dies are printed in PLA+ (solid infill) and used to stamp 1 and 2 mm thick sheet metal with the channel’s logo.

As can be observed in the video, the results aren’t bad at all after a couple of tweaks and adjustments to the pressure, but of course there is room for improvement. Some helpful commentators suggest improving the dies with properly rounded edges on the die’s shape and paying attention to K-factors and kin so as not to overstress or tear the sheet metal. In terms of die longevity, the PLA+ dies began to wear out after about a dozen tries but not the point of failure. Here other filament types might work even better, maybe even to the point of competing with a CNCed metal die.

Considering that this was a first attempt without a lot of pre-existing knowledge it went pretty well, and a future video was promised in which improvements will be shown off.

Continue reading “Sheet Metal Forming With 3D Printed Dies”

Toner Transfer, But Not For PCBs

It is old news that you can print PCB artwork on glossy paper and use a clothes iron to transfer the toner to a copper board, which will resist etchant. But [Squalius] shows us how to do a similar trick with 3D prints in a recent video, which you can see below.

The example used is a QR code, although you can use anything you can print in a mirror image. Of course, heat from a clothes iron isn’t going to be compatible with your 3D-printed plastic. The trick is to use some acrylic medium on the part, place the print face down, and apply more medium to the back of the paper.

Continue reading “Toner Transfer, But Not For PCBs”