This project is the client application for a self-trained, machine learning-based eye tracking system for VRChat.
This project and the related repositories allow you to build a database of images and tracking data for your gaze and eye openness, then train machine learning models on that database, and finally use those models for customized tracking suited to your face, eyes, and hardware. The project is compatible with ETVR firmware.
-
Hardware running ETVR's OpenIris firmware. Only Wi-Fi connections are supported at this time.
-
No need for cropping, calibration, or recentering.
-
Accurate tracking even with extreme camera angles by leveraging simultaneous predictions from two camera feeds.
-
Rapid initial connections, automatic reconnection, and automatic fallback to single-eye tracking if one camera becomes disconnected.
-
Supports both single-eye and dual-eye tracking.
-
Use a merged view for combined gaze or eye openness analysis, or independent views for each eye.
-
Supports output parameters compatible with VRC native, VRCFT v1, and VRCFT v2 standards.
Discord: Ryan9411
Discord Server: https://discord.gg/QTyU4eNKrv
-
The project is only tested on systems with 32GB+ RAM and an RTX 4080 or higher. Tracking should run well on most systems, but the model training code may run poorly or not at all.
-
Windows 10 or 11.
-
ETVR firmware newer than March 2024.
- Download the release and run the .exe to install the eye-tracking client.
- Follow the tutorial.
- Open the Status page. Keep the Headset Tracking port at its default 5005.
- Populate the Left Eye Image Data and/or Right Eye Image Data fields with the IP and Port of your eye trackers.
- Enable the Image Data - Left Eye and/or Image Data - Right Eye status cards if they are forced offline by clicking them. If your trackers are online and broadcasting on the provided IP and Port, you should see the camera feed in the Left Eye Camera and/or Right Eye Camera cards.
- Open the Database page. Click Create New Database, enter a filename, and then choose a directory.
- Open the VRTA application. Allow network access if requested.
- Under the Status page, verify VR Headset Tracking is online. If it is forced offline, click the card.
- You have the following controls in the VRTA application:
- Hold both grips for at least 1 second to start recording. You can verify this through the Theta Flags card. Record should switch to TRUE.
- A on your right joystick should enable Delete Recent for a frame. This will delete the last 10 seconds of data.
- B on your right joystick will switch between Gaze and Openness modes.
- Under the Database page, enable Record Training Data.
- In gaze mode, your objective is to stand a reasonable distance away, say at least 20 feet, stare at the dot, and move your head so you record your eye staring at the dot at an even distribution of head angles. Think of it like scanning a paper: turn your head in a line left to right, then up a tiny bit, then right to left, and so on. Repeat that pattern (or your own) to get a suitably sized training dataset. Make sure to get an even distribution over your field of vision and include samples at varying squinting levels. Blink normally.
- In openness mode, your objective is to close and open your eyes at the same rate you press your right trigger. For example, fully open = trigger not pressed; halfway open = trigger halfway pressed; fully closed = trigger fully pressed. Aim for a smooth motion and repeat it. Make sure to train blinks with your eyes looking up, up and right, right, down and right, down, down and left, left, up and left, and center. Also train squint blinks and normal blinks. Keep both eyes at the same openness value.
- Record a suitable sample size for each mode. A common target is around 20,000 images for each mode. Currently, the training program is hard-coded to limit you to 25,000 combined eye images and 35,000 single-eye images for training data for each model. In other words, 25k gaze AND 25k openness or 35k/35k for single eyes. You can record more, but it will randomly sample up to these limits. You can change the limits in the python code. Note that this has a massive impact on RAM usage.
- Install Microsoft Visual C++ Redistributable
- Install Miniconda
- Create a conda environment for ./tfgpu
- Start menu -> Anaconda Prompt or Anaconda PowerShell Prompt -> Open
> cd path/to/where/you/want/to/install/conda/env> conda create -p ./tfgpu python=3.10First time setup only> conda activate ./tfgpu> conda install -c conda-forge cudatoolkit=11.2 cudnn=8.1.0First time setup only> cd <path-to-extracted-files>/trainer> pip install --upgrade pip(It may complain and suggest a different command—just copy that command and run it instead.) First time setup only> pip install -r requirements.txtFirst time setup only> python ./create_gaze_heatmap.py(Optional but can help you see if your training data is good.)> python ./ui.py
- Select your input database, output folder, and models to train. For dual-eye users, it is recommended to train combined openness, combined gaze, left gaze, right gaze, combined openness gen2, left openness distilled, and right openness distilled.
- Start. You can monitor the process as it runs in the terminal. This may take significant time, especially on less powerful systems.
- When training finishes, you should have several .h5 files in the output directory you selected.
- Create a conda environment for ./tfjs
> cd path/to/where/you/want/to/install/conda/env> conda create -p ./tfjs python=3.10> conda activate ./tfjs> conda install -c conda-forge cudatoolkit=11.2 cudnn=8.1.0First time setup only> cd <path-to-extracted-files>/converter> pip install --upgrade pip(It may complain; copy the suggested command and run it.) First time setup only> pip install -r requirements.txtFirst time setup only> python ./convert-to-tfjs.py
- Select your folder with the .h5 files and a folder to save the converted models, which you can then import into the client.
- Select up to six models to convert. It is recommended to convert combined gaze, left gaze, right gaze, combined openness gen2, and the two distilled models for left and right openness. If you only have a single tracked eye, go with the gen2 model for that eye (not distilled).
- Start. The files should convert.
- Back in the client, on the Database page, use the Model Selection button to select a model folder.
- Select the folder containing the 2–6 generated folders specified in the Converting section.
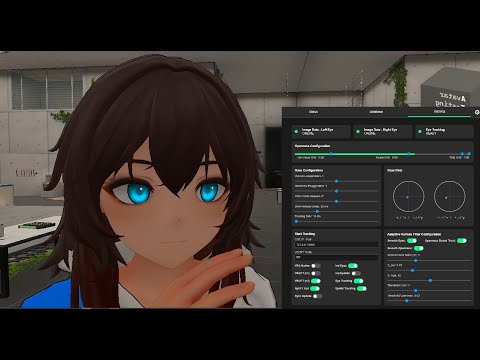
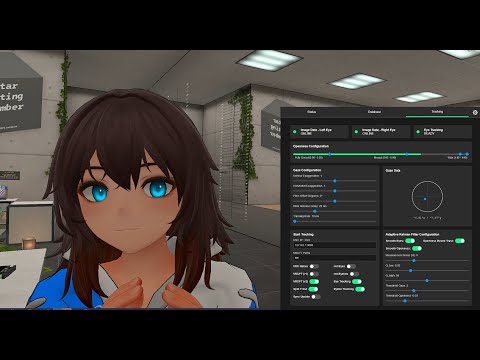
- Switch to the Tracking tab.
- Set your OSC IP : Port. It is likely
127.0.0.1:9000unless you changed it. - Set your VRCFT Prefix if you have a VRCFT v2 avatar. You can find this in the debug panel of your avatar in VRC (examples include
""(nothing),"FT","ft/f", etc.). - Toggle your output mode depending on your avatar: VRC Native, VRCFT (v1), or VRCFT (v2).
- Enable the tracking you want:
- Eye Tracking: enables eye tracking
- Eyelid Tracking: enables eyelid tracking
- Ind Eyes and/or Ind Eyelids: enables separate tracking per eye for that data.
- If all is configured properly, you should see your eyes move in VR. You can view OSC messages using Protokol or the OSC debug window in VRC.
- Tune the output to your preference.
- Enjoy tracking. If everything works well, from here on you simply need to start the application, turn on your trackers, and you are good to go.