Slidoc manages a collection of lectures and exercises written using Markdown, which is a very simple and popular markup syntax. The lectures and exercises can include text, images, interactive questions, and equations (using LaTeX notation).
Markdown files are plain text files saved using extension .md. They
can be edited using text editors like Emacs, vi,
Atom, and
StackEdit. Slidoc can publish the Markdown
files as static HTML files and
Jupyter notebooks.
It can also create a table of contents, generate an index, manage
questions and analyze concept dependencies.
The HTML files generated by Slidoc can be shared via email or hosted using free resources such as public Dropbox folders, Github project web sites etc.
The design goals of Slidoc documents are:
-
Easy to write.
-
Easy to read.
-
Easy to interact with.
-
Track understanding of concepts.
This README file provides documentation, examples and tests for Slidoc.
Notes: Using the widely-used Markdown file format, with some extensions for equations and interactivity, accomplishes the first goal. With this format, plain text editors and many other open source tools (such as Pandoc) can be used to edit and process the files. Version control is easy and sites like GitHub can be used to store and share the files.
The remaining goals are achieved using plain vanilla HTML files with embedded Javascript, allowing easy navigation between slides and lectures. The format is mobile-friendly and allows "index navigation", i.e., scrolling through portions of different lectures that discuss same concept. The embedded Javascript also provides interactivity, allowing users to answer embedded questions, tallying scores and tracking understanding of concepts.
Tags: Slidoc, design goals; slides, Markdown
Slidoc currently works only on Unix-like systems, such as OS X, Linux, etc. (A Windows port should not be too difficult, but is not currenly a priority.)
To install, download the latest release from
https://github.com/mitotic/slidoc/releases and unzip/untar it to
create the slidoc-version-number directory containing several
Python, HTML, CSS, and Javascript files.
To test the installation, create a temporary directory
slidoc-version-number/temp and set that as your working directory:
cd slidoc-version-number/temp
src/slidoc.py is the command line Markdown to HTML converter. To
test it, type the following terminal command in the temp
directory:
../src/slidoc.py ../README.md
This will create the file README.html. This is a (mostly)
self-contained HTML file with Javascript embedded for interactivity,
and can be viewed in a browser.
slidoc.py includes a simple web server for displaying HTML ouput,
and can be invoked using the following terminal command:
../src/slidoc.py -p 8082 README.md
This will display the converted version of README.md in a browser
window using the URL http://localhost:8082. You can edit README.md
file using any text editor, and the browser display will automatically
update every time you save the file in the text editor, providing a
live preview of the HTML document.
Slidoc has minimal external dependencies. The HTML converter
slidoc.py uses mistune for
HTML exports, which is already included in the src directory for
convenience. Optionally, you may install the pygments
module for code highlighting.
HTML documents produced by Slidoc automatically load the Mathjax library to display equations. This means that equations will not render without an internet connection.
The server program sdserver.py requires the Tornado web server to be
installed.
https://docs.microsoft.com/en-us/windows/wsl/install-win10
Open PowerShell as Administrator and run:
Enable-WindowsOptionalFeature -Online -FeatureName Microsoft-Windows-Subsystem-Linux
Reboot the system
Open Microsoft Store and install a Linux distribution (such as
Ubuntu)
Enter Unix username and password (may be different from Windows)
From now on, Linux can be accessed by running bash.exe
In the terminal, run
sudo apt install python-minimal
sudo apt update -y
sudo apt install python-pip
git clone https://github.com/mitotic/slidoc.git
cd slidoc/src
python slidoc.py -p 8080 ../README.md
Open the URL http://localhost:8080 using a browser
Say the root directory is Course. Typically, all lectures would be
stored in a Lectures subddirectory with ordered names like
prefix-lecture01.md.
To export some or all lectures to html format for web publishing,
create a sub-directory, say Publish. In that directory, type:
slidoc.py --all=all.html ../Lectures/prefix-lecture??.md
The above command will combine all the lectures, table of contents and
index into a single file all.html, which can be published on the web
or shared.
Alternatively, the --indexed=toc,ind,qind option can be used
instead of --all to generate separate HTML files. This will
create files named prefix-lecture01.html and so on in the Publish
directory. Additionally, it will create three files, toc.html (table
of contents) , ind.html (concept index), and qind.html (question
index). These are static web files which can be served from any web
server. In addition to free services such as
public Dropbox folders
and Github project web sites, low-cost web
hosting services like Site44 and
NearlyFreeSpeech.net are also
worth considering.
Tags: lecture management: index, concepts
Notes: The --indexed=,ind, option can be used with null arguments
to control generation of index files.
Markdown files are plain text files saved using extension .md. They
can be edited using text editors like Emacs, vi,
Atom, and StackEdit. The
Markdown Preview Plus
package for Atom supports live rendering of Markdown (with math) while
you edit. There is also a
Chrome extension
of the same name to render Markdown in the browser.
Tags: Markdown, editing
Slidoc recognizes several extensions to standard Markdown to process slides in a lecture.
-
Each file begins with a Level 1 title header (
# Lecture Title) in the first slide. -
Each new slide may have an optional Level 2 header (
## Slide title) (Higher-level headers may also be used, but they will not be numbered.) -
If a Level 2 header is not present at the start of a slide, a horizontal rule, i.e., a line with three or more horizontal dashes (
---), may be used to indicate the start of a slide. -
Since the horizontal rule denotes the end of the slide, by default, Slidoc will not recognize the use of dashes to underline Level 2 headers, even though Markdown syntax allows it.
Notes: Any Level 1 header other than the first one will be treated like a Level 2 header.
Tags: :Slidoc, document structure
Two additional pieces of information may optionally be included in each slide: a list of tags/concepts and additional notes. A tag list may appear anywhere in the slide, but notes can only appear at the very end of the slide.
Example:
Tags: primary topic1; primary topic2, subtopic2: secondary topic3, subtopic3; secondary topic4; ...

Notes: Additional material
Tag/concept lists are used generate an automatic index. Indexing is done separately for regular slides and question slides. Slidoc supports concept chain navigation. Starting from the index, you can easily navigate between all places in the document where a particular concept is discussed.
Tags: concepts, list; concepts, multiple: concepts, tracking
Notes: Tag lists have two parts: primary tag list and secondary tag list, separated by a colon. Either part may be omitted. (If there are no primary tag, then a colon should precede the secondary tag list.)
Tag lists are semicolon-separated. Each tag
uses the syntax topic, subtopic where topic or subtopic is a
space-separated phrase, with subtopic being optional. Tags are not
visible during a slideshow, but are displayed in the printed version
of the lecture.
Notes are additional material that appear below the main content. In slideshow mode (see below), notes are normally shown collapsed (or hidden) in the slide for compactness, but may be expanded and scrolled into view.
Slidoc features a built-in "slideshow" mode, allowing you to switch
seamlessly between scroll view and slide view anywhere in the
document. Slide view is enabled by clicking on the square
(▣) icon on the bottom left. The Escape key may
also be used to enter/exit slide mode. Pressing ? during a slideshow
displays a list of keyboard shortcuts.
The slideshow mode can be used for quick navigation around the document:
-
Press Escape to enter slideshow
-
Use
h,e,p,n, or left/right arrow keys to move around quickly -
Press Escape to exit slideshow
Tags: slideshow: navigation
Notes: Unlike a true slideshow, vertical scrolling is permitted in each slide, allowing essentially unlimited supporting material such as Notes.
Specifying the command option --features=incremental_slides enables
incremental display of lists and fragments in slideshows using
Pandoc syntax.
- Block quoted lists with bullets
"> -"are displayed incrementally.
- Use the Down arrow to display incremental elements.
- The keyboard shortcut
imay also be used.
The ellipsis (...) may also be to indicate incremental display of
remaining paragraphs.
...
Alternatively, the CSS classes slidoc-incremental1,
slidoc-incremental2 and so on may be added to elements for
incremental display (see Another slide with images).
...
Final paragraph.
Tags: incremental display: lists, incremental
Slidoc supports a restrictive type of slideshow mode known as the paced mode, where the user is forced to view the document as a sequence of slides. Information about the state of a paced slideshow is saved in the persistent local storage of the browser, using the filename as the key. It is enabled by the options:
--pace=pace_level --slide_delay=delay_sec
-
pace_levelif non-zero, implies that document is to be viewed in in an incremental fashion, as a slideshow, until the last slide is reached. (Switching to scrolling view is permitted, unless the featureslides_onlyis enabled.)pace_level=1allows viewing slides and answering questions in any order prior to submission.pace_level=2requires sequential viewing and each question to be attempted before proceeding further. -
delay_secif non-zero, forces a minimum delay between slides
The Notes portion of a question slide is hidden until a correct response is received or all tries are exhausted.
Tags: paced mode
Slides can normally be advanced only one at a time in paced mode. This means that "slide skipping", i.e., forward slide navigation through internal links is typically not used in paced mode. However, if a set of consecutive questions is answered correctly, forward slide navigation is enabled. Thus, a single forward slide link can be included in the final question in a sequence to enable adaptive assessment. (The forward link could be hidden in the Notes portion, so that it only becomes visible after the question is answered.)
If you answer the sequence of questions correctly, you earn the privilege of skipping the next several slides (up to the forward link destination). The skipped portion may contain extra questions and explanatory material aimed at those who failed to answer correctly. Those who earn the privilege of skipping the extra questions automatically receive full credit for those questions. However, they may still choose to answer some or all of the extra questions (without penalty for answering incorrectly).
Tags: adaptive assessment
When you attempt each question in a Slidoc document, along with the score, the concepts associated with that question are also tracked. The score is displayed on the top right corner. By clicking on the score, you can view a list of concepts associated with the questions that you answered incorrectly, sorted in decreasing order of difficulty.
To analyze concept dependency for lectures and exercises delivered, create a temporary subdirectory and use a command like:
slidoc.py --indexed=toc,ind,qind --crossref=xref.html ../Lectures/prefix-lecture0[1-6].md ../Lectures/prefix-exercise0[123].md
This will generate the concept dependency analysis for the first six
lectures and the first three exercises in the files ind.html
(concepts index), qind.html (questions index), and xref.html
(cross-referencing info).
The qind.html file has a map analyzing each question for all the
concepts it covers, and relating it to other questions which cover a
subset of these concepts.
Tags: concept dependency analysis: index, questions
Slidoc supports internal links that refer to other slides using a
# in the reference syntax:
[text](#header)
If header is the same as text, a simpler notation may be used:
[text](#)
Headers (at all levels) are automatically referrable. For example, see [another answer](#Simple function code answer) or Simple function code answer.
If the header name is too long to be conveniently linked, a shorter reference can be appended to the header using the notation:
## header {#short-ref}
like the one that links to this slide. Short references may only contain letters, digits, underscores, hyphens and dots.
Notes: To refer to an arbitrary portion of non-header text, define the reference using the notation:
[phrase]{#mnemonic}
This [phrase]{#mnemonic} can be referred to elsewhere as phrase:
[phrase](#mnemonic)
Double hash ## links may be used to refer to concept index entries, like
markdown or [multiple-choice questions](##questions, multiple choice):
[markdown](##) OR [multiple-choice questions](##questions, multiple choice)
Link prefixes of the form #: may be used to append automatically
generated counter values, like figure numbers:
[Figure ]{#:my_figure}. Figure caption
[Figure ]{#:my_figure} can then can be referred to elsewhere as
[Figure ](#:my_figure)
Look at Figure . For figure numbers with sections
(e.g., 1.2), use #::my_sectional_figure.
For references, the above syntax allows for two options:
[Newton (1687)](#ref-newton1687)

[]{#ref-newton1687} Newton, I., 1687: ...
for author-based references like Newton (1687)
[]{#ref-newton1687} Newton, I., 1687: ...
Alternatively,
[[](#:ref-einstein1905)]

[]{#:ref-einstein1905}. Einstein, A., 1905: ...
for numeric references[].
[]{#:ref-einstein1905}. Einstein, A., 1905: ...
Slidoc distinguish 8000 es between normal slides and slides with questions. Questions are slides of the form:
Question statement

Answer: X

Tags: ...
where X can be a, b, etc. for multiple-choice questions, a
number for numeric answers, or some text for open-ended answers. For
unspecified answers, X should be choice, number, or text.
Correct text answers with markup, or spanning multiple lines, can be
provided as Notes or in the next slide with a Level 3 header
containing the word answer.
The optional concepts list for questions is analyzed by Slidoc for dependencies.
Tags: questions: concept list
Level 3 header will not be listed in table of contents. The --hide=[Aa]nswer
can be used to hide this answer slide.
Notes: Adding the --strip=hidden option will remove it completely.
Hidden headers {.slidoc-hidden}
Pandoc-style attributes may added to headers, as shown above, to hide headers. This may be useful if the slide already contains an image including the header text.
By specifying a match pattern (regex) for slide titles, answers in
question slides and text slides containing answers can be hidden at
first glance. Clicking on the answer prefix or the slide title will
reveal the answers. The following command will hide all slides with
the string Answer or answer in the title (as well as answers
specified in question slides).
slidoc.py --hide=[Aa]answer ...
The following command
slidoc.py --hide=[Aa]answer --strip=hidden ...
will strip answers completely from the printable .html files.
Tags: answers, hiding; answers, stripping
Alternatively, to simply convert Slidoc Markdown to
Jupyter notebooks,
use the md2nb.py command:
md2nb.py ../Lectures/prefix-lecture03.md ../Lectures/prefix-lecture04.md
By default, all fenced code blocks are converted to code
cells. Specifiying the --indented option also converts indented code
blocks to code cells. Use the -h option to list all command options.
The reverse conversion, from notebook to Markdown format, can be
accomplished using nb2md.py. Another script, md2md.py, can be used to
transform Markdown documents by removing tag lists,
embedding/exporting images etc.
Tags: jupyter notebook: code, fenced; code, indented
Handling images is a bit tricky when using Markdown. For Slidoc, the convention is to use web URLs or to store images in a local folder and include references of the form

If the Markdown file is named session.md, the image hello.png
can be located either in the folder named _images or in a folder
named session_images. Slidoc will automatically adjust the image
reference during HTML conversion, and create a folder named
session_images in the destination directory, if necessary. This
behavior allows all images associated with each Markdown file to be
stored in a separate folder, while still allowing Markdown files to be
renamed easily. Using folder names other than _images disables this
behavior. (Option --image_dir=_images can be used to force this
behavior, if the image reference is not of the above form.)
If session.md, including images, is to be stored in a github repository,
then it should be saved in its own directory named session, with
Markdown in session/session.md and images in session/_images. This
will allow images to be rendered inline by github.
Image files can be given a unique name, like hello.png, or use
generic names of the form image01.png. Slidoc can renumber images of
the latter type automatically.
Notes: The script md2md.py can be used to apply several Markdown
tranformations as follows:
md2md.py --strip=tags,notes doc.md
The above example creates a new file doc-modified.md with tag lists and
notes stripped out.
Other supported operations include:
-
--fence|--unfence: Convert fenced code to indented code and vice versa -
--images=check,web: Check that all image references in the document are valid, including web references. -
--images=copy,renumber --dest_dir=...: Copy all image references to destination, with optional renumbering of images -
--images=import,web: Import all image references into the document as data URLs (including web URLs) -
--images=import,web,embed: Import all image references, embed them as data URLs and create a single, large, self-contained HTML document. -
--images=export,embed: Export all data URLs from document as local files, and convert all Markdown image references to HTML<img>tags. -
--strip=extensions: Stripslidoc-specific extensions.
Although slidoc documents are best viewed as HTML documents,
sometime you may need to print them or save them as PDF files.
You can create a single document from a set of Markdown files, open it
in the browser, and select the Show all chapters option. You can
then print it or save it as PDF. (The --printable option can be used
to preserve internal links when printing, but it should not be used
for web view.)
To customize what appears in the document, you can use the --strip
option. It accepts a list of comma-separated values from the list
answers,chapters,tags,contents,hidden,navigate,notes,rule,sections
You can also specify --strip=all or --strip=all,but,...
An alternative way to export Slidoc documents is to install the free
open source program wkhtmltopdf that
converts HTML documents produced by slidoc.py to PDF. The included
program sdprintpy is a wrapper around wkhtmltopdf that can be used
to create user-specific PDFs for paced sessions.
Tags: exporting; printing; PDF; wkhtmltopdf
The slidoc.py supports several additional command line
options. Use the following command to display them:
slidoc.py -h
These options include:
-
--cssTo use custom CSS file (by modifyingtemplates/doc_custom.css) -
--toc_headerTo insert custom Markdown or HTML header before Table of Contents -
--features=equation_numberTo automatically number Mathjax equations -
--features=untitled_numberNumber all untitled slides (useful for generating question banks)
Default options for the slidoc.py command can be specified in the first
line of the first file using the following format:
Slidoc: features=equation_number
The above line appears as the first line of this README file. (These options can be overridden by explicity specifying options in the command line.)
Tags: command line, options: options, default
Notes: The default options may also be specified using a first line of the form
<!--slidoc-options features=equation_number -->
to make the file conform to standard Markdown syntax.
The remaining slides are example slides used to illustrate the Markdown
slide format and to test slidoc.py
Inline formulas are supported using the LaTeX-style syntax. For example,
\(\alpha = \beta *\gamma* \delta\)
renders inline as (\alpha = \beta \gamma \delta). Enable the
--features=tex_math option if you want to use the TeX $ syntax:
$\alpha = \beta *\gamma* \delta$
which would render as $\alpha = \beta \gamma \delta$.
Block equations are also supported using the LaTeX block syntax:
\[
  \alpha = \beta *\gamma* \delta
\]
renders as
[ \alpha = \beta \gamma \delta ]
Can also use Latex-style equation blocks:
\begin{equation}
   \label{eq:a}
   E = mc^2
\end{equation}
which renders as
\begin{equation} \label{eq:a} E = mc^2 \end{equation}
Using the --features=equation_number option for automatic equation numbering, you
can refer to the above equation inline as
\(\ref{eq:a}\)
which renders as ((\ref{eq:a}))
Tags: equations; mathjax
Notes: Equations are also allowed in notes: (\boldsymbol{\alpha} = 1+\omega) (note the use of bold face for Greek symbol)
(The -- separator below can be used to create additional
vertical slides containing notes in reveal.js.)
Code snippets can be included using the fenced syntax or the 4-space indented syntax.
Fenced code snippet
def sq(a):
    return a**2
print 'The square of 4 is', sq(4)
The square of 4 is 16
When converting to notebook format, fenced code is converted to a code
cell. For fenced code, the pseudo-language nb_output can be used to
indicate the output produced by executing a notebook cell (as shown
above).
Indented code snippet
def sq(b):
    return b**2
print 'The square of 4 is', sq(4)
When converting to notebook format, indented code is not converted to a code cell (unless explicitly requested).
Tags: code, fenced; code, indented
Slide with no header
Slides with no header are omitted from the table of contents.
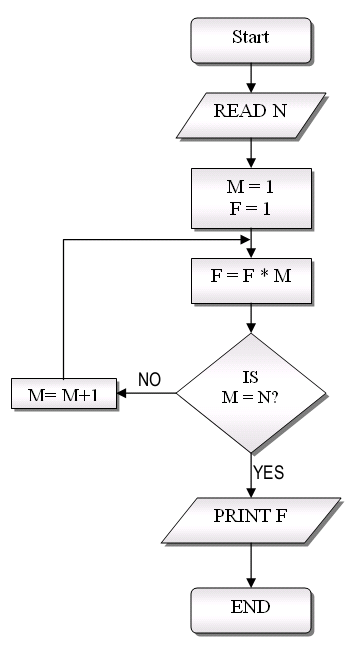
Flowchart example of image (Image ) inserted using Markdown syntax:
[Image ]{#:elnino1}: El Nino time series
Alternatively, an internal image reference can be used:
[Image ]{#:elnino2}: Another El Nino time series
The reference blank.gif can be defined elsewhere in the
document. The definition can be a web URL or a data URL:
[blank.gif]: data: URL "title height=100"
Images can also be inserted directly as HTML tags (allowing control over height/width)
<img height=100 src="http://upload.wikimedia.org/wikipedia/commons/d/d6/FlowchartExample.png">
[Image ]{#:flowchart}: Flowchart
Slidoc also supports an extension to the Markdown title syntax that
embeds attributes align, height, and width in the title of an
image (either in the link itself or in the definition, in case of a
reference). Style classes can also be included using the .class
notation, such as in the example below that incrementally displays the image.
[Image ]{#:resized}: Resized image
Tags: image, metadata; image, style; image, incremental
Slidoc supports a simple format for framing interactive questions. For multiple-choice questions, the format is similar to the Aiken format used by Learning Management Systems like Moodle. For numeric response questions, formulas (similar to Excel macros) may be used to randomize the question (see Interactive numerical response question). Text response ("essay") questions are also supported.
The next slide contains a multiple choice question that uses the A..
notation allowing interactive response. (The space after the .. is
required.) Click on a choice to view the correct answer.
Tags: questions, interactive: questions, multiple-choice; questions, numeric response; questions, formulas; questions, text response
In Shakespeare's play Hamlet, the protagonist agonizes over answering a multiple-choice question. What choice does he agonize over?
A.. Letter A
B.. Letter B
C.. Letter C
D.. Letter D
Answer: B
Tags: questions, interactive: questions, multiple-choice
Notes:
To be or not to be-that is the question:
Whether 'tis nobler in the mind to suffer
The slings and arrows of outrageous fortune,
Or to take arms against a sea of troubles,
And, by opposing, end them.
What is the square root of =SqrtTest.number();;6.25?
Answer: =SqrtTest.expect() ;; 2.5+/-0.1
Tags: questions, numeric response: questions, formulas; questions, randomized
Notes: An optional error range may be provided after +/-. The error
range may be a number or a percent value, i.e. +/- 5%
Embedded javascript functions may be used as formulas, using the notation
`=pluginName.funcName()`
To display a default reference value, append it, separated by a double
semicolon (;;). View the raw Markdown text for this document to see
the embedded javascript code that randomizes the question.
Params: m=25 a=9.81
Newton's second law relates force (F) to mass (m) and acceleration (a):
[ F = m \times a ]
For (m) = =m and (a) = =a, we have (F) = =m*a;;01*10**1
Notes: Declare parameters as follows:
Params: m=value1 a=value2 ...
Parameter definition lines may occur anywhere in a slide and multiple times, provided each parameter is defined only once per slide. The definitions persist until overridden in any subsequent slide.
Parameters may be used as variables in Javascript-style expressions as follows:
... we have F = `=m*a;;0.25`
The format value after the double semicolon (;;) is optional. The format value determines
the precision of the output and is of the form:
0.123 OR 1.2e10 OR 1*10**3 OR 01*10**(-3)
The * is replaced by × and ** by superscripts. The leading
zero forces scaled exponential display (with fixed exponent).
Params: x=-9.5:9.5:0.5
What is the square root of the absolute value =x ;; 6.25?
Answer: =(x < 0) ? (-x)**0.5 : x**0.5 ;; 2.50+/-0.2
Notes: A range of randomly selected parameter values can be specified as follows:
Params: x=value1:value2:step y=value1,value2,value3
If omitted, the step is automatically computed to provide between 20-200 intervals.
Javascript-style dynamic formulas can occur as answers. The format value after
;; also serves as the correct answer and can include an optional error
range after +/-
The dinosaur named tyrant lizard is more commonly known as?
Answer: T.Rex OR T Rex OR T-Rex OR Tyrannosaurus Rex
Tags: questions, text response
Notes: The upper-case OR is used to separate correct answer options,
which are not case-sensitive. If a correct answer option includes a
space (e.g., T Rex, it is compared to the user response with
normalized spaces, i.e, T Rex would be considered correct, but not
TRex). If the correct answer option does not include a space, such as
the answer to a coding question, then all spaces are stripped from the
user response before comparison, i.e., T.Rex and T. Rex would be
considered correct.
Write a python function to add two numbers.
Answer: text/x-code
Tags: questions, text response
Notes: This is an example of an open-ended text answer question.
The answer
def add(a, b):
    c = a + b
    return c
Notes: The above function accepts two arguments and returns the sum of the two arguments.
--
This is an example to test hiding of answer slides.
| Item | Value | Qty |
|---|---|---|
| Computer | $1600 | 5 |
| Phone | $12 | 12 |
| Pipe | $1 | 234 |
What is the best way to deal with climate change?
A.. Mitigation
B.. Adaptation
C.. Geoengineering
D.. Move to Mars
Answer: choice
Notes: If no correct answer is provided, all answers are scored as being correct.
What number is the answer to the Ultimate Question of Life, the Universe and Everything?
Answer: number
Notes: All answers are assumed correct.
To be or not to be - that is the question. What is the answer?
Answer: text
Notes: All answers are assumed correct.
Solution to open response question
Notes: Notes on answer to open response question
Slidoc paced sessions may be linked to a Google Docs spreadsheet. The
spreadsheet will be updated with information for each user such as the
last access time, slides viewed, questions answered etc. To create the
link, first create a Google Docs spreadsheet, say course101. Then
attach the script scripts/slidoc_sheets.js to course101 using the
Tools->Script Editor... menu item. Complete instructions are
provided in the initial comments in slidoc_sheets.js. You will need
to specify a secret authentication key (auth_key) during setup to
control programmatic access to the spreadsheet. Choose a random
string, without spaces, for the key. The following command can be used
to generate a random string:
src/sliauth.py -g
After linking the script, you can use the Current web app URL for
course101
src/sdserver.py is a server program that implements a basic Learning
Management System with a Google Docs spreadsheet as the back end
database. It uses the python
Tornado web server framework, which is
included in many python packages, like Anaconda. If not already
installed, install it using:
pip install tornado
To test run sdserver, first create the source directory source for
Markdown files and the static directory web for web files in the
temp directory:
mkdir source web

../src/sdserver.py --source_dir=./source --web_dir=./web --dry_run --dry_run_file_modify --server_url=http://localhost:8899 --auth_type=adminonly --auth_key=testkey
By default, the server listens on domain localhost and port 8899,
but the port can be changed using the --port=... option. The
--dry_run... options enable testing the server without a Google
Sheets back end.
To administer the web site, login with username admin and
authentication key testkey. The --auth_type=adminonly option all
usernames to login without any password.
For help info on all the server options, type:
../src/sdserver.py --help
It is possible to use record user responses to interactive Slidoc
questions even without a web server, by directly linking Slidoc
documents to a Google Docs spreadsheet. Use the Current web app URL
for course101 from the previous step when generating the HTML
documents:
slidoc.py --gsheet_url=web_app_url ...
By default, users will use a unique user name or other identifier
(such as the email address) when they start a paced session. The
Google Docs spreadsheet course101 will contain a separate sheet for
each session, and also an index sheet named sessions_slidoc, with
information about all sessions, including any submission due
dates. You can also choose to create (or upload) a roster_slidoc
sheet to restrict user access. The spreadsheet will display a Slidoc
menu for managing users and analyzing session responses.
The authentication key can use to generate login and/or late
submission tokens. If you use a secret key, include it in the
slidoc command, and use the sliauth.py command to generate access
tokens:
slidoc.py --gsheet_url=web_app_url --auth_key=auth_key --due_date 2016-05-03T23:59 ...
sliauth.py -a auth_key user_name(s) # For login tokens
sliauth.py -a auth_key -s session_name --due_date 2016-05-10T23:59 user_name(s) # For late submission tokens
The Slidoc menu in the spreadsheet can also be used to automatically
generate and email login tokens and late submission tokens to users
(if the roster_slidoc sheet is set up). User may use the late
submission token none to submit late without credit.
Submitted sessions can be graded by logging in with user name admin
and the authentication key as the token.
Tags: google docs: due date; login token; late submission token
Since Slidoc generates self-contained HTML files, it is possible to
embed a Jupyter Notebook within a slide. To test that, copy
the Slidoc-generated README.html version of this file to a
subdirectory files of the notebook server working directory. The
start the server as follows:
jupyter notebook --NotebookApp.extra_static_paths='["./files"]'
The notebook server will then statically serve the HTML file from the
following link: http://localhost:8888/static/README.html
To display the notebook Untitled.ipyb (say), edit this slide to
include the following
7900
iframe HTML element:
<iframe src="http://localhost:8888/notebooks/Untitled.ipynb" style="width:720px; height:600px;"></iframe>
(just unindenting the above line should do it)
Tags: notebook, embed
Note: Support for reveal.js may not be current, since the Slidoc
slide view automatically supports many slide show features.
Slidoc supports creating slideshows using
reveal.js. To enable it, specify
--slides=THEME,CODE_THEME,FSIZE,NOTES_PLUGIN the option. This will
create a *-slides.html file will be created for each source file.
a. THEME: Text theme for reveal.js, e.g., black, white, (more)
b. CODE_THEME: Code theme for highlight.js, e.g., github, zenburn, (more)
c. FSIZE: Font size, e.g., 200%
d. NOTES_PLUGIN: Local directory where the notes plugin is
installed (for presentation mode, see below)
Any of the above can be a null string, or be omitted, e.g. --slides=,
or --slides=,,190%
Tags: reveal.js; slideshow, reveal.js
Notes: To customize the presentation further, edit the
templates/reveal_template.html template file.
Notes appear as a vertical slide. The separator -- may be used to
split up the notes as multiple slides in the vertical. An alternative
presentation mode, with two views, is also available. In this case,
notes are not displayed in the normal view but only displayed in the
presenter view.
In a reveal.js slideshow, the following keyboard shortcuts may be
useful:
-
fto enter fullscreen mode,ESCto exit -
oto enter outline mode,ESCto exit -
Home(orFn+Left Arrow) for first slide -
End(orFn+Right Arrow) for last slide -
?to display keyboard shortcuts
Tags: reveal.js, keyboard shortcuts: slideshow, reveal.js
reveal.js has a presentation mode which displays a timer, notes for
the current slide, as well as a preview of the next slide. This mode
requires the installation of the notes plugin files in a local
subdirectory where the contents files are located (symlinking should
also work).
If the plugin is installed in reveal.js/plugin/notes, use the
command
slidoc.py --slides=,,,reveal.js/plugin/notes
to generate the slides file.
When viewing slides, type s to open a new browser window with the
presentation mode. Turn off any mirroring of displays. Display the
standard window on the projected window and the presentation window in
the desktop/laptop window.
Tags: reveal.js, presentation mode