Hey Beta testers,
Elementor 3.23 beta is now available, and we would love to hear your feedback on the new Search Widget that displays search results as visitors type into the search box. You can also try high converting features like Floating Buttons and Link in Bio Widgets.
Make an impact on the future of Elementor by testing the 3.23 beta and sharing your impressions on the latest additions:
- [Pro] New Search Widget
- Floating Buttons
- Link In Bio Widgets
- Improved Nested Elements Editor Performance
- And More!
[Pro] New Search Widget With Live Results
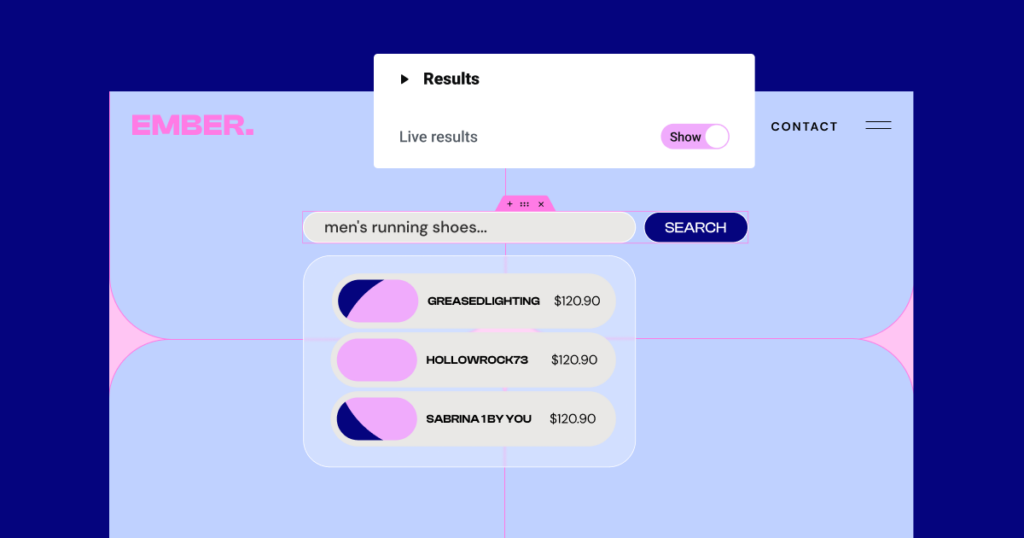
The new Search Widget helps your visitors find what they are looking for faster and empowers you to design a pixel-perfect visitor experience.
Display Live Results As Visitors Type
The new widget also comes with the exciting ability to display live search results as visitors type into the search box, which helps you bring more awareness to additional products and content. The results are displayed in loop templates that appear in the dropdown box under the search input. To turn on Live Results, navigate to the Content Tab, and click into the Results Section. Choose which loop template you want to display your live results with, or build a new loop item from the Theme Builder. You can also customize the dropdown box’s layout by setting the number of results displayed at once and how many columns they are displayed in, along with the minimum number of characters typed into the input before live results are displayed. Additionally, you can write and style a “nothing found” message for when no results match the search value.
Filter Search Queries
Keep visitors focused on the right content with the ability to filter search results by customizing the Search Widget’s query. This allows you to choose which source you would like the widget to display results from. The default setting is “All”, but you can also choose “Product”, “Posts”, and any other custom post type. Additionally, you can narrow the widget’s query even further by entering taxonomies or specific posts or products into the include or exclude inputs. Changing the search query will affect both the live results displayed as visitors type alongside the items displayed in the search results template.
Advanced Design Capabilities
Place the Search Widget onto your page, and begin customizing and styling the search input alongside the clear-search and submit buttons. You can change the placeholder text in the input, assign different icons for the button from the icon library or upload a custom SVG, and choose how to send visitors to the search page results – by pressing Enter, clicking on the search button, or both.
To activate the new experiment, activate “Search” by going to WordPress Dashboard → Elementor → Features. Activating the experiment won’t affect Search Form Widgets already in use, but you won’t be able to place new ones from the Widget Panel.
How to Test It:
- Ensure the “Search” feature is activated by navigating to the Elementor menu in WordPress → Settings → Features.
- Create a new page and add the Search widget to the Editor.
- Explore the options, such as changing the placeholder text, adding a clear icon, and finding the right submit action you need.
- Click on publish, check the live page, type a search term, and click the search button. You should be redirected to a search results template (created before with Search Archive).
- Ensure everything is working as expected.
- Go back to the page and continue exploring the widget’s capabilities.
- Go to the Results section and activate the live results.
- You need a loop template to use the live results – Add a loop template you created previously or navigate to the Theme Builder to create a new loop item template.
- Test the different options in the live results, such as setting minimum search characters before the results appear, setting the maximum number of items to view, and more.
- Next, go to the Query section and set the desired query filter.
- Switch to the Style tab and continue styling your search input field, button, and live results section.
- You can also style the “nothing found” message if there are no results.
- Click on publish, and check the live page.
- Start typing in the search field, and live results appear based on the search term (you can also test this in the editor).
- Ensure everything is working as expected in the editor and front end.
Contact Made Simple: Introducing New Floating Buttons
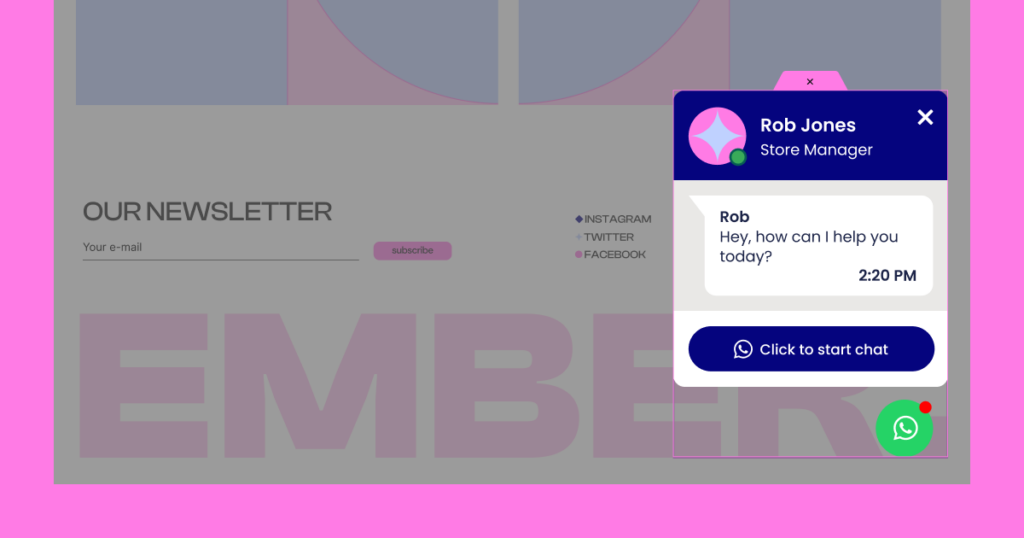
Convert more visitors into leads with Floating Buttons that make starting a conversation with visitors easier than ever. Floating Buttons will appear as a sticky button wherever you want on your webpage. When the button is clicked by visitors, the buttons expand to display various contact buttons and information depending on your chosen template, or activate a connected messaging platform like email, Whatsapp, Viber, and more.
Floating Buttons are templates, so add them to your website by navigating to the WordPress Admin > Templates > Floating Buttons. Click on Add New Floating Button and choose a customizable pre-designed template. Now begin setting up your Floating Button. Each template can be customized according to the different content they include. For example, if you have chosen the Single Chat template, you can choose the messaging platform, and enter your information like phone number, email, etc. You can also customize the content like the avatar and the message in the chat bubble. The Style section gives you design capabilities to stay on brand by setting the color and typography of different elements along with entrance and exit animations.
Lastly, the Advanced Tab allows you to choose where to position the button and chat box on the page. Elementor Pro includes a number of different Floating Button templates and can set display conditions to choose when, where, and to who you want the Floating Button displayed. If you are using the free version of Elementor, you can use one of the templates, and display it on your entire site without the ability to set Display Conditions. Set the Floating Button display for the entire site from WordPress Admin > Templates > Floating Buttons.
To activate the new experiment, activate “Flexbox Container” & “Floating Buttons” by going to WordPress Dashboard → Elementor → Features.
How to Test It:
- Ensure the “Flexbox Container” and “Floating Buttons” features are activated by navigating to the Elementor menu in WordPress → Settings → Features.
- Navigate to the Elementor Template area, and locate the Floating Button section.
- Click on the “Add new Floating Buttons” button.
- You will be redirected to create a template, and a template library with pre-designed options will appear.
- This is a mandatory step because you need to start with a template to create a floating button.
- Click to insert your desired template.
- Continue to explore the floating button’s capabilities in the Content and Style tabs. You will have different settings and style options depending on the template you choose.
- Navigate to the Advanced tab and define where to position the Floating Button and other options.
- You can name your template by clicking the cog icon and adjusting the Title field.
- Click on the publish button to start defining where the button will appear on your website.
- Pro users:
- A display condition window will appear on publish while editing the template, allowing you to set where to present the floating button.
- Choose where to display it: on the entire site or on a specific page.
- Free users:
- After clicking on publish, please navigate back to WordPress > Elementor Templates > Floating Buttons.
- Locate the template you just created and hover over it. You will notice a “Set as entire site” link. Click on it if you want the floating button to appear on the entire website.
- If you have two floating buttons (or more), you can only set one floating button for the entire site at a time.
- You can remove it from being presented on the site by clicking “Remove from the entire site.”
- Explore different templates to learn about the floating button’s capabilities.
- Ensure everything is working in the editor and front end.
Check Out New Link In Bio Widgets
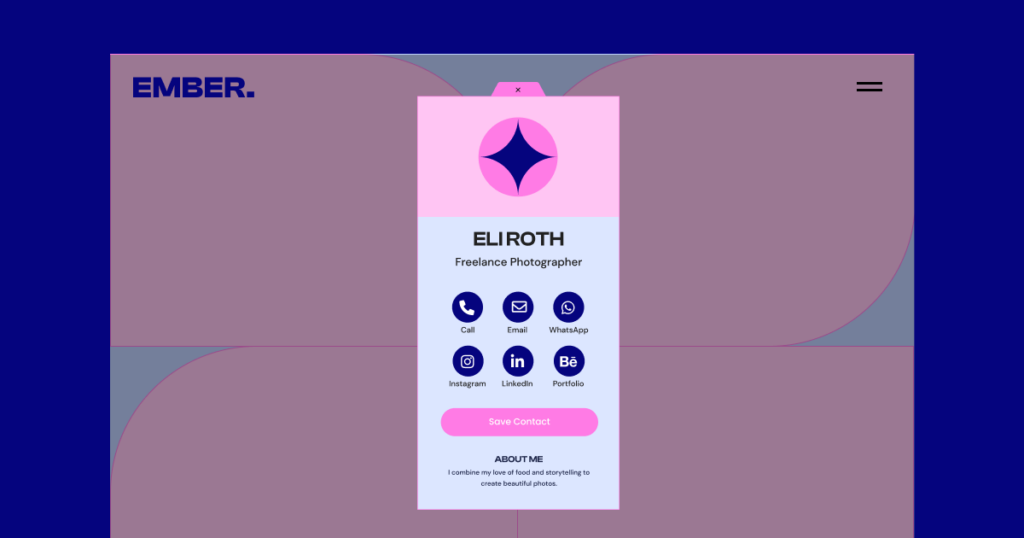
The new Link in Bio widgets make it easy to increase engagement with your online presence and drive traffic to key parts of your site. A perfect solution for when your website is still under construction or if you generally want to keep your vital information on one webpage. Drag one of the seven different widgets available for Elementor Pro subscribers from the new Link In Bio section in the Widget Panel. Each widget is built differently to match your needs, like promoting a service, displaying a business card, showcasing your portfolio, and more. Once you’ve chosen which widget you want to use, you can customize its content and style from scratch or choose from pre-designed blocks in the template library. Choose different images from the media library, write your own titles, and choose which social icons you want to display. You can also stay on brand by changing the element’s colors and the text’s typography settings from scratch or using new design blocks from the template library to jumpstart your design.
Elementor Pro includes seven new Link In Bio Widgets, one of which is also included in the free version of Elementor.
To activate the new experiment, activate “Link In Bio” by going to WordPress Dashboard → Elementor → Features.
How to Test It:
- Ensure the “Link In Bio” feature is activated by navigating to the Elementor menu in WordPress → Settings → Features.
- Create a new page and locate the new Link In Bio section in the widget panel.
- You can choose between seven widgets, each with a different purpose and use case.
- Choose one of the widgets, for example, the Minimalist widget.
- Explore the Content tab and start designing your link in bio by adjusting the Identity image, adding details in the Bio section, and enhancing the design with Icons and CTA links.
- Navigate to the Style tab and explore the different style options for each part of the link in bio.
- Explore the different link in bio widgets and ensure everything works as expected.
- Ensure everything is working as expected in the editor and front end.
Seamless Workflow: Nested Elements Optimization
While nested elements have been incredibly useful for building intricate layouts in your Accordion, Tabs, Carousel, Mega Menu, and Off Canvas Widgets, their building experience has slowed the Editor, causing frustration. Version 3.23 addresses this issue by upgrading the widget’s infrastructure, so every change to the widget will only affect the relevant element and not require reloading the entire widget. This upgrade improves editor interaction time by 60%-98%, depending on the action type, to ensure a smooth building experience.
How to Test It:
- Ensure the “Flexbox Container,” “Nested Elements,” and “Menu” features are activated by navigating to the Elementor menu in WordPress → Settings → Features.
- Create a new page and add various nested elements: Accordion, Tabs, Carousel, and Menu widget.
- Add elements inside the nested elements.
- Since we adjusted the rendering mechanism regarding nested elements inside the editor, please try to adjust the repeaters: add, delete, duplicate, etc.
- Add different elements inside each widget, and explore the user experience while editing the nested elements.
Accessibility Improvements & Additional Updates
Version 3.23 makes your Mega Menus more accessible for visitors who rely on screen reader technology. By restructuring the DOM output of Mega Menus, screen readers can now scan your website’s code more accurately, and associate menu items with their content areas and vice versa. Note that the changes to the DOM may require changes to custom code applied to your Mega Menu.
Additionally, the following status changes will be made to experiments and features:
- Lazy Load Backgrounds Images: promoted to Stable, and active by default for existing sites.
- Element Caching: Promoted to Beta Status, and active by default on new websites.
How to Install the Beta Version
If you still haven’t enabled beta testing in Elementor, please follow these steps:
- Go to Elementor > Tools > Versions
- Enable the beta tester feature
- Go to Dashboard > Updates and update to the latest beta version.
- This will get you set up to test the new Elementor 3.23 Beta.
Notes
As we make changes to our GitHub in an effort to keep it organized, improve the way we deliver information to you, and our ability to review your feedback, please follow the instructions below when reporting bugs, or making feature requests:
- To report a bug related to this beta version – open a new Bug report
- For feature requests – open a new Feature request issue
- For other comments specifically about this beta version – comment here
Designated time for release: July 15th (Estimated)
Many thanks for your support and help!
Cheers,
Elementor Team
