Nginx伺服器下如何設定使用索引目錄

nginx設定
  location ~ ^/2589(/.*)
  {
    autoindex on; //开启
    autoindex_localtime on;//开启显示功能
}auto_index指令
語法: autoindex on | off;
設定段: autoindex off;
設定段: http, server, location
啟用/僅使用nginx目錄索引功能.
語法: autoindex_exact_size on | off;
設定段:autoindex_exact_size on;
設定段: http, server, location
制定是否額外得顯示檔案得大小,單位為位元組,mb,gb等等.預設是開啟得
syntax: autoindex_localtime on | off;
設定段: autoindex_localtime off;
設定段: http, server, location
指定是否顯示目錄或檔案得時間,預設為不顯示。
nginx fancy實現漂亮的索引目錄
nginx索引目錄自帶的功能很簡單,而且不好看,如何做一個漂亮的索引列表.接下來看.
安裝環境
系統:centos 6.3nginx:1.4.2
fancy: http://wiki.nginx.org/ngxfancyindex
下載安裝fancy
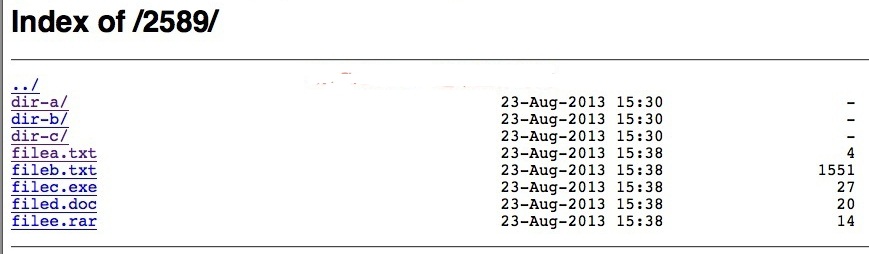
#對比nginx內建的index效果(上篇文章貼過來的圖),如下
# wget http://gitorious.org/ngx-fancyindex/ngx-fancyindex/archive-tarball/master
# tar -xzvf master
# wget http://nginx.org/download/nginx-1.4.2.tar.gz
# tar -xzvf nginx-1.4.2.tar.gz
# cd nginx-1.4.2
# ./configure --prefix=/usr/local/nginx-1.4.2 --add-module=../ngx-fancyindex-ngx-fancyindex
# make
# make install
fancy索引配置
server {
listen  80;
 server_name test.jb51.net;
 access_log /data/logs/nginx/test.jb51.net.access.log main;
index index.html index.php index.html;
 root /data/site/test.jb51.net;
location / {
}
 location ~ ^/2589(/.*)
 {
 fancyindex on;
 fancyindex_exact_size off;
 fancyindex_localtime on;
 fancyindex_footer "myfooter.shtml";
 }
 }
看看nginx加了fancy的效果,如下圖.

比自帶的好看多少,這個不好說...反正就是....變好看了點~
參數解釋:
fancyindex on:開啟fancy索引
fancyindex_exact_size off:不使用精確的大小,使用四捨五入,1.9m會顯示為2m這樣.如果開啟的話,單位為字節
fancyindex_localtime on:使用本地時間
fancyindex_footer "myfooter.shtml":把目前路徑下的myfooter.shtml內容當作底部.檔案不存在底部會出現404
myfooter.shtml內容如下:
<!-- footer start --> <div id="footer"> <a id="gotop" href="#" false;">回到顶部</a> <a id="powered" href="http://wordpress.org/">wordpress</a> <div id="copyright"> 版权所有 © 2006-2015 本站 </div> <div id="themeinfo"> <a href="//www.jb51.net/about/">关于我们</a> | <a href="//www.jb51.net/sitemap.html">网站导航</a> | <a href="//www.jb51.net/sitemap.xml">网站地图</a> |<a rel="nofollow" href="http://www.miibeian.gov.cn/">苏icp备14036222号</a> </div> </div> <!-- footer end --> fancy指令使用:
fancyindex
語法:
*fancyindex* [*on* | *off*]
預設值: fancyindex off
配置區塊: http, server, location
描述: 開啟/關閉目錄索引功能
fancyindex_css_href
#語法:
*fancyindex_css_href uri*
預設值: fancyindex_css_href ""
配置區塊: http, server, location
描述: 外接css路徑,這個css將會取代掉現有的css樣式。如果你會css,那你可以把索引列表做得更加漂亮.咱們ttlsa沒有網頁設計師,所以只能用自帶的了^^
fancyindex_exact_size
語法:
*fancyindex_exact_size* [*on* | *off*]
默認值: fancyindex_exact_size on
配置區塊: http, server, location
描述: 定義如何顯示檔案的大小,預設為on,on:檔案大小使用精確值,單位為位元組.off:單位為kb, mb,gb,若含有小數點,將會四捨五入。例如1.9mb,將會顯示為2mb。
fancyindex_footer
語法:
*fancyindex_footer path*
預設值: fancyindex_footer ""
設定區塊: http, server, location
說明: 指定哪個檔案嵌入到索引頁面的底部,效果請看本文的第一張圖片
fancyindex_header
語法:
*fancyindex_header path*
預設值: fancyindex_header ""
設定區塊: http, server, location
說明: 指定哪個檔案嵌入到索引頁面的頭部.用法和fancyindex_footer類似
fancyindex_ignore
語法:
*fancyindex_ignore string1 [string2 [... stringn]]*
預設值: no default.
配置區塊: http, server, location
描述: 哪些文件/目錄隱藏掉,如果你的nginx支援正規表示,那麼可以使用正規表示式來過濾
例如我想隱藏dir打頭的檔案或目錄以及檔案filea.txt,設定如下:
fancyindex_ignore "dir*" "filea.txt"
fancyindex_localtime
語法:
*fancyindex_localtime* [*on* | *off*]
預設值: fancyindex_localtime off
設定區塊: http, server, location
以上是Nginx伺服器下如何設定使用索引目錄的詳細內容。更多資訊請關注PHP中文網其他相關文章!
熱AI工具

Undresser.AI Undress
人工智慧驅動的應用程序,用於創建逼真的裸體照片

AI Clothes Remover
用於從照片中去除衣服的線上人工智慧工具。

Undress AI Tool
免費脫衣圖片

Clothoff.io
AI脫衣器

AI Hentai Generator
免費產生 AI 無盡。
熱門文章
熱工具

記事本++7.3.1
好用且免費的程式碼編輯器

SublimeText3漢化版
中文版,非常好用

禪工作室 13.0.1
強大的PHP整合開發環境

Dreamweaver CS6
視覺化網頁開發工具

SublimeText3 Mac版
神級程式碼編輯軟體(SublimeText3)
熱門話題
 nginx如何配置虛擬主機
Apr 14, 2025 am 08:15 AM
nginx如何配置虛擬主機
Apr 14, 2025 am 08:15 AM
配置 nginx 虛擬主機允許在一個服務器上託管多個網站,每個網站擁有獨立域名和根目錄。具體配置步驟包括:創建虛擬主機配置文件配置服務器塊,指定服務器監聽端口、虛擬主機域名和文檔根目錄啟用虛擬主機,將配置文件鏈接到啟用目錄重新加載 nginx
 nginx如何配置負載均衡
Apr 14, 2025 am 08:33 AM
nginx如何配置負載均衡
Apr 14, 2025 am 08:33 AM
如何配置 Nginx 進行負載均衡?定義上游服務器池,指定服務器 IP 和端口。定義虛擬主機,監聽連接並轉發到上游池。指定位置,匹配請求並轉發到上游池。
 nginx中如何重定向
Apr 14, 2025 am 08:42 AM
nginx中如何重定向
Apr 14, 2025 am 08:42 AM
通過 Nginx 進行重定向的方法有 301 永久重定向(更新鏈接或移動頁面)和 302 臨時重定向(處理錯誤或臨時更改)。配置重定向涉及在 server 塊中使用 location 指令,高級功能包括正則表達式匹配、代理重定向和基於條件的重定向。重定向的常見用途包括更新 URL、處理錯誤、將 HTTP 重定向到 HTTPS,以及引導用戶訪問特定國家或語言版本。
 nginx怎麼查看運行狀態
Apr 14, 2025 am 11:48 AM
nginx怎麼查看運行狀態
Apr 14, 2025 am 11:48 AM
查看 Nginx 運行狀態的方法有:使用 ps 命令查看進程狀態;查看 Nginx 配置文件 /etc/nginx/nginx.conf;使用 Nginx 狀態模塊啟用狀態端點;使用 Prometheus、Zabbix 或 Nagios 等監控工具。
 nginx如何配置php
Apr 14, 2025 am 08:09 AM
nginx如何配置php
Apr 14, 2025 am 08:09 AM
配置 Nginx 運行 PHP 的步驟包括:安裝 PHP、安裝 Nginx、編輯 Nginx 主配置文件添加 PHP 配置、創建 PHP 文件、重啟 Nginx、測試 PHP,成功後會顯示 "PHP is working!" 消息。
 如何查看nginx版本信息
Apr 14, 2025 am 08:24 AM
如何查看nginx版本信息
Apr 14, 2025 am 08:24 AM
通過以下方法查看 Nginx 版本信息:直接命令法:“nginx -v” 輸出版本信息。配置文件中查看:在配置文件頂部找到“version”部分。系統信息命令:Linux:使用“rpm -qa | grep nginx”或“dpkg -l | grep nginx”命令。 FreeBSD:使用“pkg info nginx”命令。 Windows:打開 Nginx 服務屬性,版本信息位於“常規”選項卡。
 如何重啟nginx的服務
Apr 14, 2025 am 08:27 AM
如何重啟nginx的服務
Apr 14, 2025 am 08:27 AM
要重啟 nginx 服務,請執行以下步驟:1. 使用 sudo systemctl stop nginx 停止服務。 2. 使用 sudo systemctl start nginx 啟動服務。 3. 使用 sudo systemctl reload nginx 重新加載配置。
 nginx如何開啟偽靜態
Apr 14, 2025 am 08:21 AM
nginx如何開啟偽靜態
Apr 14, 2025 am 08:21 AM
如何開啟 Nginx 偽靜態?啟用 MultiViews 模塊,允許服務器根據擴展名搜索文件。添加偽靜態規則,將 .php URL 重寫到匹配的 PHP 文件。確保 Web 服務器進程有權訪問 PHP 文件。重啟 Nginx 以應用更改,從而實現 URL 映射到文件路徑的功能。