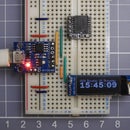
Introduction: Footstep Magic
This instructables show how to use LILYGO T-QT Pro dev device play some footstep magic.
Supplies
- LILYGO T-QT Pro
- Happy Birthday Projector
- Kids ABS soccer shinguards
- SW-18015P Vibration Sensor Switch
- 502025 Lipo Battery
- 14mm x 14mm heatsink (optional)
Step 1: What Magic We Can Play?
There are many animations that cast magic when the main character takes a big step on the floor. Elsa in "Frozen" is a great example.
What if we could project a short animation onto the floor as we take a big step on the floor?
Let's make it possible!
Step 2: How Does It Work?
There is a toy projector in the market that can project a tiny positive film image to the wall. It is used for party decoration.
We can replace the positive film by a tiny modified LCD for playing a short animation. Add a shake sensor to detect the big step motion and then trigger the projection accordingly.
Step 3: 3D Printing
Please download and print the 3D parts at thingiverse:
Step 4: Software Preparation
Arduino IDE
Download and install Arduino IDE latest 1.x version if not yet:
https://www.arduino.cc/en/software
Arduino-ESP32
Follow installation step to add Arduino-ESP32 support if not yet:
https://docs.espressif.com/projects/arduino-esp32/en/latest/installing.html
Arduino_GFX Library
Open Arduino IDE Library Manager by selecting "Tools" menu -> "Manager Libraries...". Search "GFX for various displays" and press "install" button.
You may refer my previous instructables for more information about Arduino_GFX.
avilib
Download and import the avilib library to Arduino IDE:
https://github.com/lanyou1900/avilib.git
JPEGDEC
Open Arduino IDE Library Manager by selecting "Tools" menu -> "Manager Libraries...". Search "JPEGDEC" and press "install" button.
arduino-esp32fs-plugin
Follow installation step to add Arduino-esp32fs-plugin if not yet:
https://github.com/lorol/arduino-esp32fs-plugin
Note:
You may refer to Arduino Documentation for the details on how to import library to Arduino IDE.
Step 5: Prepare Short Animation
Youtube has a Veritasium program called "Why are snowflakes like this?". I cut a few seconds of snowflakes growing video clip then adjust a little bit perspective to make a short animation for this project.
Thanks to Dr Ken Libbrecht for showing us how to grow designer snowflakes. Obviously, this video would not have been possible without his help and his expertise. His website is full of information about snowflakes http://snowcrystals.com. His new book is also available to purchase from here -- https://ve42.co/SnowCrystalsBook
Step 6: Upload Program
Please download the program at GitHub:
https://github.com/moononournation/FootstepMagic.git
Then open the FootstepMagic.ino in Arduino IDE, compile and upload to LILYGO T-QT Pro. Remember also upload the AVI files using Arduino IDE tools ESP32 Sketch Data Upload.
Step 7: LCD Backlight Teardown
After check the program animation display ok, follow the above video steps teardown the LCD backlight.
Step 8: Test Projector
Step 9: Soldering Work
Here are the summary of the wire connection:
Ref.:
Step 10: Assembly
Step 11: Install Heat Sink (Optional)
The projector LED can be very hot if turn on continuously so it needs a heat sink. But it is not a problems ofr this project since the LED should only turn on a few seconds for each big step.
Step 12: Apply Black Masking Tape
This is a no screws design, just using masking tape for fixing.
Step 13: Fix Projector to Shinguards
This is a no screws design, just using double adhesive tape for fixing.
Step 14: Test Footstep
Step 15: Happy Halloween!
This is the best Frozen costume I even seen, enjoy!
Step 16: What's Next?
This project program using AVI format playing animation, because it is designed playing sound. Simply add I2S module and tiny speaker can make it happen.
You may not a big Frozen fans, you can replace the animation with any other things. E.g. a rotating burning magic circle, a growing Lotus, land breaking effect and much more...
Step 17: Update 1
If you are not yet print the case, remember print v2 version. The new version can fixing with zip ties, you can feel more comfort when you make a big step. Enjoy!


